
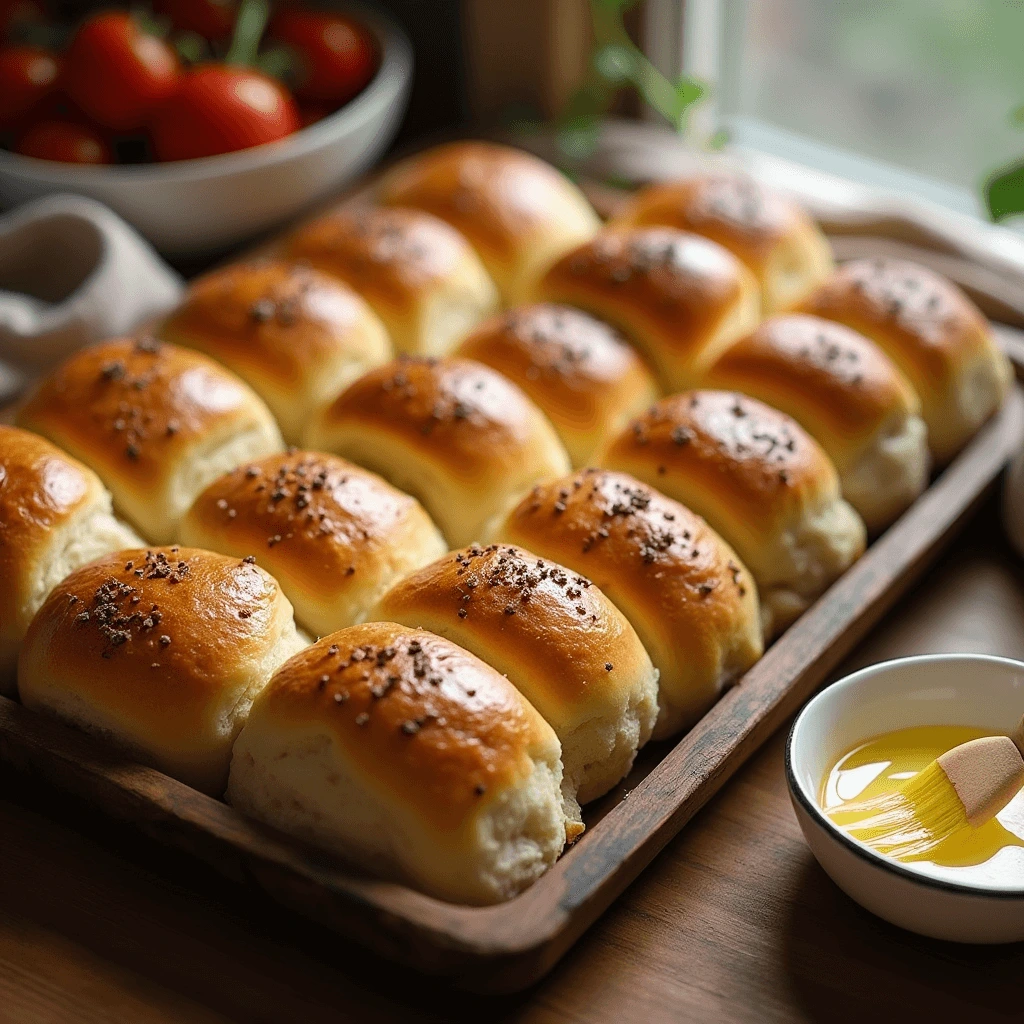
There’s nothing quite like the aroma of freshly baked dinner roll recipe no yeast straight from the oven. But if you’re short on time or don’t have yeast on hand, you might think homemade bread is out of the question. That’s where this dinner roll recipe no yeast comes in! These soft, fluffy, and buttery rolls are incredibly easy to make and require no waiting for the dough to rise—perfect for busy weeknights or last-minute gatherings.
Unlike traditional yeast-based bread, this recipe relies on baking powder and baking soda as the leavening agents, which help create a light, tender texture without the need for proofing. With just a handful of pantry staples like all-purpose flour, milk, butter, and eggs, you can whip up a batch of golden-brown dinner rolls in under 30 minutes.
These quick and easy no-yeast rolls are also incredibly versatile. Whether you serve them alongside a comforting bowl of soup, as a side for a holiday meal, or simply enjoy them warm with butter and jam, they’re sure to be a hit at the table. Plus, they’re a great option for those who prefer a faster, hassle-free alternative to traditional bread recipes.
In this guide, I’ll walk you through the simple ingredients, step-by-step instructions, and expert tips to ensure your dinner rolls turn out perfectly every time. Get ready to bake the best no-yeast dinner rolls with minimal effort and maximum flavor!
Table of Contents
Why You’ll Love This dinner roll recipe no yeast
Soft, Fluffy, and Ready in Minutes
One of the best things about this dinner roll recipe no yeast is how quickly and easily you can make a batch of warm, homemade bread. Unlike traditional yeast rolls, which require proofing and long rise times, these rolls use baking powder and baking soda as leavening agents. This means you can mix the dough, shape the rolls, and have them baking in the oven within minutes—perfect for when you need a quick and delicious side for dinner.
Despite the fast preparation time, these rolls still deliver the soft, pillowy texture you’d expect from traditional bread. The secret lies in the combination of flour, butter, and milk, which helps create a tender, airy crumb. Using cold butter or incorporating a small amount of buttermilk can add even more softness, ensuring the rolls stay light rather than dense.
Additionally, the baking temperature plays a crucial role in achieving the perfect golden-brown crust while keeping the inside soft and fluffy. Baking these rolls at a slightly higher temperature (around 375°F to 400°F / 190°C to 200°C) allows them to rise quickly and develop a nice, crisp exterior without drying out.
Since there’s no waiting involved, these rolls are a lifesaver for busy weeknights, unexpected guests, or last-minute meal prep. Whether you’re making them to accompany soup, a hearty main dish, or simply as a snack, these quick no-yeast dinner rolls are ready in less time than it takes to order takeout!
No Waiting for Dough to Rise – Quick and Effortless Baking
One of the biggest advantages of this dinner roll recipe no yeast is that it completely eliminates the time-consuming proofing process required for traditional yeast rolls. If you’ve ever made bread with yeast, you know that it often takes one to two hours for the dough to rise properly before you can even think about baking. That’s fine if you have plenty of time, but on busy days when you need fresh, homemade rolls fast, waiting for dough to rise simply isn’t practical.
With this recipe, you can skip that step entirely! Instead of yeast, the dough relies on baking powder and baking soda as leavening agents. These ingredients work instantly, creating bubbles in the dough that help the rolls rise as soon as they hit the heat of the oven. This means you don’t need to let the dough rest or proof—just mix, shape, and bake!
Why Is No-Rise Dough So Convenient?: dinner roll recipe no yeast
- Saves Time: Instead of waiting one to two hours for the dough to rise, you can have your rolls mixed, baked, and ready to serve in under 30 minutes.
- Beginner-Friendly: No need to worry about proofing yeast correctly, kneading the dough extensively, or waiting for the perfect rise—just follow the simple steps and get great results.
- Last-Minute Meal Solution: Whether you need a quick side for dinner or suddenly realize you’re out of bread, this recipe saves the day without compromising on taste or texture.
- Consistent Results Every Time: Since yeast can sometimes be tricky to work with, removing it from the equation ensures that these rolls turn out perfectly every time.
How Do These Rolls Rise Without Yeast?
In traditional yeast bread, the yeast feeds on sugars and produces gas, which causes the dough to expand. Since we’re skipping the yeast, this recipe uses baking powder and baking soda, which react with acidic ingredients like buttermilk or milk to create an instant rise. This means the dough puffs up beautifully as soon as it starts baking, giving you that soft, fluffy texture without any waiting.
So, if you’re craving fresh homemade rolls but don’t have hours to spare, these no-yeast dinner rolls are the perfect solution. Just mix up the dough, pop them in the oven, and enjoy delicious, golden-brown rolls in record time!
Perfect for Last-Minute Meals – A Quick and Delicious Bread Alternative
There’s nothing more frustrating than realizing you need bread at the last minute—whether you’re serving up a cozy homemade soup, preparing a family dinner, or putting together a quick snack. That’s where this dinner roll recipe no yeast comes to the rescue! These rolls are designed to be made from scratch in under 30 minutes, making them the perfect go-to solution for busy weeknights, unexpected guests, or when you simply don’t have time to run to the store.
Unlike traditional yeast-based bread that requires kneading, proofing, and long wait times, these quick and easy dinner rolls can be prepared on demand. Because they rely on baking powder and baking soda for leavening instead of yeast, you can mix up the dough, shape the rolls, and have them baking immediately—no need to plan ahead.
Why These Rolls Are Perfect for Last-Minute Meals: dinner roll recipe no yeast
- Fast Prep Time: The entire process—from mixing the dough to baking—takes less than 30 minutes.
- Simple Pantry Ingredients: No need for fancy or hard-to-find ingredients; you likely already have flour, baking powder, butter, and milk in your kitchen.
- Versatile for Any Meal: These rolls can pair with almost anything—serve them with soups, stews, salads, breakfast spreads, or even as a side for roasted meats and pasta.
- Great for Unexpected Guests: When guests show up unexpectedly and you need a warm, homemade bread option in a hurry, these no-yeast dinner rolls save the day.
Ways to Serve These Quick No-Yeast Rolls: dinner roll recipe no yeast
- With butter, honey, or jam for a simple yet satisfying snack.
- Alongside a warm bowl of soup or stew to soak up all the flavors.
- As a side for pasta dishes or roasted meats, making dinner feel complete.
- As a base for mini sandwiches or sliders, perfect for a quick lunch or appetizer.
A Reliable Bread Alternative for Any Occasion
Not only are these soft, fluffy, and buttery, but they also provide a hassle-free alternative to traditional yeast rolls. Whether you’re in a rush, forgot to buy bread, or just want a quick homemade option, these no-yeast dinner rolls are the perfect solution for satisfying your craving without the wait.
So next time you need fresh bread in a pinch, skip the store-bought options and whip up a batch of these quick, delicious dinner rolls—you won’t believe how easy they are!
Essential Ingredients for dinner roll recipe no yeast

Flour: All-Purpose Flour Works Best “dinner roll recipe no yeast”
When it comes to making the perfect no-yeast dinner rolls, the type of flour you use plays a crucial role in determining the texture, structure, and overall success of the recipe. All-purpose flour is the ideal choice because it has just the right balance of protein and gluten to create soft, fluffy, and tender rolls while still providing enough structure to hold their shape.
Why All-Purpose Flour is the Best Choice
- Perfect Gluten Content: All-purpose flour typically has a protein content of 10-12%, which helps develop just the right amount of gluten. This creates a soft, slightly chewy texture without making the rolls too dense.
- Easy to Work With: Unlike bread flour, which has a higher protein content and can make rolls a bit too chewy, all-purpose flour gives you a light and airy crumb—ideal for quick, no-yeast baking.
- Readily Available: Most home kitchens already have all-purpose flour on hand, making this recipe convenient and beginner-friendly without needing specialty flours.
- Versatile for Adjustments: Whether you prefer a softer roll or one with a slightly crispier crust, all-purpose flour allows you to adjust the texture by modifying ingredients like butter, milk, or mixing time.
Can You Use Other Types of Flour?
If you don’t have all-purpose flour on hand, here are some alternative options and how they might affect the final result:
✅ Self-Rising Flour – Can be used as a substitute, but since it already contains baking powder and salt, you’ll need to adjust the recipe by reducing those ingredients accordingly.
✅ Whole Wheat Flour – Adds a slightly nutty flavor and more fiber but can make the rolls denser. If using whole wheat flour, consider replacing only half of the all-purpose flour to maintain a lighter texture.
✅ Bread Flour – Has a higher protein content (12-14%) and will result in a chewier, more structured roll. If using bread flour, be careful not to overmix, as it can create a tougher texture.
✅ Gluten-Free Flour – A 1:1 gluten-free baking flour blend can work, but you may need to add a binding agent like xanthan gum to help with structure, as gluten-free doughs tend to be more fragile.
Tips for Using Flour in No-Yeast Dinner Rolls
- Measure Flour Correctly: Always spoon and level your flour instead of scooping directly from the bag to avoid adding too much, which can make the rolls dry.
- Sift for Extra Softness: If you want extra light and airy rolls, consider sifting your flour before mixing it into the dough.
- Don’t Overmix the Dough: Overworking the flour will develop too much gluten, resulting in tougher, denser rolls. Mix until just combined for the best texture.
By choosing the right flour and handling it properly, you’ll ensure your no-yeast dinner rolls turn out soft, tender, and delicious every time.
Leavening Agents: Baking Powder and Baking Soda for a Light Texture
Since this dinner roll recipe no yeast doesn’t rely on traditional yeast for rising, it uses a combination of baking powder and baking soda as leavening agents. These ingredients play a crucial role in creating soft, fluffy, and airy rolls by introducing tiny air pockets into the dough, allowing it to rise beautifully during baking. Understanding how these leavening agents work will help you achieve the perfect texture every time.
How Baking Powder and Baking Soda Work in dinner roll recipe no yeast
1. Baking Powder – The Primary Leavening Agent
Baking powder is a double-acting leavening agent, meaning it works in two stages:
- First Activation: It starts working as soon as it comes into contact with liquid in the dough, creating small gas bubbles that begin to aerate the mixture.
- Second Activation: When exposed to heat in the oven, it releases even more gas, helping the rolls expand and achieve a light, fluffy texture.
Why it’s important: Baking powder ensures that the rolls rise evenly, creating a soft, airy crumb instead of a dense, heavy texture.
2. Baking Soda – Enhancing the Rise and Texture
Baking soda is a single-acting leavening agent, meaning it starts working immediately when mixed with an acid. In this recipe, it reacts with acidic ingredients like buttermilk or yogurt, producing carbon dioxide gas that makes the rolls rise even more.
Why it’s important: Baking soda gives the dinner roll recipe no yeast an extra boost, making them lighter and more tender while balancing flavors. However, it must be paired with an acid to work properly.
Why Use Both Baking Powder and Baking Soda?
Using both leavening agents in this recipe ensures the best possible texture for dinner roll recipe no yeast:
✅ Baking Powder provides a steady rise, ensuring the rolls don’t collapse or turn out flat.
✅ Baking Soda reacts instantly, helping create a soft and airy structure while neutralizing acidity.
✅ Together, they create the perfect balance of lift, fluffiness, and texture, making these rolls just as delicious as yeast-based versions.
Tips for Using Baking Powder and Baking Soda Correctly: dinner roll recipe no yeast
- Check Freshness: Expired baking powder or baking soda won’t produce a good rise. To test, mix a small amount of baking powder with water or baking soda with vinegar—if it bubbles actively, it’s still good to use.
- Measure Accurately: Too much baking soda can leave a bitter aftertaste, while too little will prevent the rolls from rising properly. Stick to the recommended amounts in the recipe.
- Mix Gently: Overmixing can deflate the air pockets that help the dough rise, resulting in dense rolls. Stir until just combined for the best texture.
- Use the Right Acid: If using baking soda, pair it with an acid like buttermilk, yogurt, or vinegar to activate the leavening process effectively.
Final Thoughts
The combination of baking powder and baking soda makes these dinner roll recipe no yeast incredibly light, fluffy, and soft. By understanding how these ingredients work together, you can confidently bake rolls that rise beautifully without the wait—a perfect solution for quick, homemade bread in minutes!
Liquids: Milk or Buttermilk for Moisture
The choice of liquid in your dinner roll recipe no yeast is essential for achieving the perfect soft and fluffy texture. Using milk or buttermilk instead of water provides richness, moisture, and tenderness, ensuring that your rolls don’t turn out dry or crumbly. These ingredients also enhance the flavor and contribute to the golden-brown crust when baked.
Why Milk is an Excellent Choice for dinner roll recipe no yeast
Milk is a common liquid used in bread and roll recipes because it adds richness and softness while helping to create a tender crumb. Here’s why milk works so well:
✅ Enhances Moisture: The natural fats and proteins in milk keep the rolls soft and prevent them from drying out.
✅ Promotes Browning: The natural sugars (lactose) in milk help create a beautiful golden-brown crust.
✅ Improves Texture: Compared to water, milk makes the rolls softer and more tender because of its fat content.
✅ Mildly Sweet Flavor: Whole milk adds a slight sweetness that enhances the overall taste of the rolls.
Best type of milk to use: dinner roll recipe no yeast
- Whole milk is ideal because of its fat content, making the rolls rich and soft.
- 2% milk works well too, but the rolls may be slightly less tender.
- Non-dairy milk (such as almond, oat, or soy milk) can be used, but choose unsweetened versions to avoid altering the flavor.
Why Buttermilk is a Game-Changer
If you want even softer, fluffier, and more flavorful rolls, consider using buttermilk instead of regular milk. Buttermilk has a tangy flavor and acidity, which works wonders for the dough:
✅ Creates Extra Softness: The acid in buttermilk helps break down the gluten in the flour, resulting in an ultra-tender texture.
✅ Works with Baking Soda: Since buttermilk is acidic, it activates the baking soda, giving the rolls an even better rise and lighter texture.
✅ Enhances Flavor: The slight tanginess of buttermilk adds a delicious depth of flavor, making the rolls taste more like traditional bakery-style bread.
Don’t have buttermilk? Here’s how to make a quick substitute:
If you don’t have buttermilk on hand, you can make your own by mixing:
- 1 cup of milk + 1 tablespoon of lemon juice or vinegar
- Stir and let it sit for 5–10 minutes before using.
This homemade buttermilk alternative will provide the same acidity needed to help the rolls rise properly and improve their texture.
Which Liquid Should You Use?
The choice between milk and buttermilk depends on your preference:
- Use regular milk if you want a simple, classic dinner roll that’s soft and slightly sweet.
- Use buttermilk if you want extra fluffiness, enhanced flavor, and a slightly tangy taste.
No matter which liquid you choose, both milk and buttermilk ensure your no-yeast dinner rolls turn out moist, tender, and delicious every time.
Pro Tips for Using Liquids in Your Dough
✔ Use Warm (Not Hot) Milk: Slightly warm milk (around 100–110°F or 37–43°C) helps create a smoother dough and allows the baking soda or powder to activate more efficiently.
✔ Don’t Overuse Liquid: Adding too much milk or buttermilk can make the dough too sticky. Add gradually and mix until just combined.
✔ For Extra Softness, Brush with Milk Before Baking: This gives the rolls a nice golden color and enhances their flavor.
Final Thoughts
Whether you choose milk for a mild, buttery flavor or buttermilk for extra tang and fluffiness, both options make these no-yeast dinner rolls incredibly moist, tender, and delicious. Experiment with both to see which one you love best!
Fats: Butter or Oil for a Rich Flavor “dinner roll recipe no yeast”
The choice of fat in your no-yeast dinner roll recipe plays a crucial role in determining flavor, texture, and moisture. Whether you use butter or oil, both options help create soft, tender rolls that are rich in taste and have a beautiful golden crust. Understanding how each fat works will help you customize your rolls to suit your preferences.
Why Fat is Essential in dinner roll recipe no yeast
Fat is a key ingredient in bread and roll recipes because it:
✅ Adds Richness and Flavor – Fat enhances the overall taste, making the rolls more indulgent.
✅ Creates Softness – Fat coats the flour’s proteins, preventing excessive gluten development, which results in a softer, more tender texture.
✅ Locks in Moisture – Fats help retain moisture, ensuring that the rolls don’t turn out dry or crumbly.
✅ Enhances Browning – Butter and oil contribute to a golden-brown crust, making the rolls visually appealing.
Using Butter for a Buttery, Indulgent Flavor
Butter is one of the best fats for making dinner rolls because it adds a rich, slightly sweet, and creamy flavor. It also contributes to a flaky texture and helps create a beautiful golden crust when baked.
🔹 Types of Butter to Use:
- Unsalted butter is best because it allows you to control the salt content in the recipe.
- Salted butter can be used, but you may need to reduce the added salt in the dough.
- Melted butter mixes easily into the dough, ensuring an even distribution of fat.
- Softened butter can be used if you want a slightly richer, layered texture.
🔹 How Butter Affects the dinner roll recipe no yeast:
✔ Enhances flavor with its rich, slightly sweet, and creamy taste.
✔ Creates a soft crumb by coating the flour and reducing excessive gluten formation.
✔ Improves browning for a beautiful golden crust.
✔ Adds a light flakiness, making the rolls even more tender.
🔹 Pro Tip: For an extra buttery finish, brush the tops of the rolls with melted butter before and after baking. This enhances their softness and gives them a deliciously rich taste.
Using Oil for Extra Moisture and a Lighter Texture
If you prefer a softer, more tender texture without the pronounced butter flavor, oil is a great alternative. Unlike butter, which solidifies when cool, oil remains liquid at room temperature, helping the rolls stay soft longer.
🔹 Best Oils to Use:
- Olive oil – Adds a slight richness and depth of flavor.
- Vegetable oil – Neutral in taste, making it ideal for those who want the butter flavor to come from brushing instead of the dough.
- Coconut oil – Adds a subtle sweetness and extra moisture (use refined coconut oil for a neutral taste).
- Canola oil – Light and neutral, great for keeping rolls soft without altering the flavor.
🔹 How Oil Affects the dinner roll recipe no yeast:
✔ Makes the rolls extra soft and prevents them from becoming dry.
✔ Creates a slightly chewier texture compared to butter.
✔ Helps rolls stay fresher longer, as oil retains moisture better than butter.
✔ Gives a neutral base, allowing other flavors (like herbs, garlic, or honey) to shine.
🔹 Pro Tip: If using oil, try brushing the rolls with olive oil or melted butter after baking for added flavor.
Butter vs. Oil: Which One Should You Use?
Both fats work well, but they offer slightly different results:
- Use butter if you want: richness, buttery flavor, and a slightly flaky texture.
- Use oil if you want: a super soft texture and a neutral taste that lets other ingredients shine.
- For the best of both worlds: Use a mix of butter and oil—oil in the dough for softness and melted butter brushed on top for flavor.
Final Thoughts
Whether you choose butter for richness or oil for extra softness, adding fat to your no-yeast dinner rolls ensures they turn out moist, tender, and delicious every time. Experiment with different fats to see which one you love best, or try a combination for the ultimate soft, buttery, and flavorful dinner roll!
Step-by-Step Guide to Making dinner roll recipe no yeast

Step 1: Mixing the Dry Ingredients Properly dinner roll recipe no yeast
The foundation of any great dinner roll recipe no yeast starts with properly mixing the dry ingredients. This step is crucial because it ensures even distribution of the leavening agents, salt, and flour, which helps the rolls rise uniformly and achieve a soft, fluffy texture. Skipping or rushing this step can result in dense, uneven, or poorly risen dinner roll recipe no yeast.
Why Proper Mixing of Dry Ingredients is Important
✅ Ensures Even Rise – The baking powder and baking soda need to be evenly distributed throughout the flour to ensure the rolls rise properly and have a light, airy texture.
✅ Prevents Lumps – Mixing the dry ingredients thoroughly prevents clumps of baking soda or baking powder, which can lead to uneven texture or unpleasant bitter spots in the dinner roll recipe no yeast.
✅ Creates a Uniform Dough – Properly mixed dry ingredients help create a dough that is smooth and easy to handle, without pockets of flour or uneven leavening.
Step-by-Step Guide to Mixing the Dry Ingredients
1. Start with the Right Flour
The base of your dough is all-purpose flour, which provides the perfect balance of structure and tenderness. Before adding it to your bowl, you can sift the flour to aerate it, which helps make the dinner roll recipe no yeast even softer and fluffier.
🔹 Pro Tip: If you’re substituting whole wheat flour for a healthier version, mix it with all-purpose flour (50/50) to maintain a light texture.
2. Add the Leavening Agents
Since these are dinner roll recipe no yeast, baking powder and baking soda act as the rising agents. They work by creating air bubbles in the dough, allowing the dinner roll recipe no yeast to rise as they bake.
🔹 How to ensure even mixing:
- Use fresh baking powder and baking soda – expired leavening agents won’t give the proper rise.
- Sprinkle the baking powder and baking soda evenly over the flour instead of dumping it all in one spot.
- Use a whisk or sifter to help distribute them evenly.
🔹 Pro Tip: If your rolls tend to turn out dense, check if your leavening agents are fresh by testing them:
- Baking powder: Mix 1 teaspoon with warm water—if it bubbles immediately, it’s still active.
- Baking soda: Mix 1 teaspoon with vinegar or lemon juice—if it foams, it’s still good to use.
3. Add the Salt and Sugar
Salt and sugar are small but important ingredients in this step. They not only enhance flavor but also affect the texture and browning of the rolls.
🔹 Salt: Helps strengthen the dough structure and balances the flavor. Make sure it’s evenly mixed so no area is overly salty.
🔹 Sugar: Adds slight sweetness and helps the rolls achieve a golden-brown crust during baking.
🔹 Pro Tip: If you prefer savory dinner roll recipe no yeast, reduce the sugar slightly, but don’t remove it completely, as sugar helps with browning and adds a nice balance of flavor.
Best Tools for Mixing Dry Ingredients
To ensure an even mixture, use the right tools:
✔ Whisk: Helps aerate the flour and evenly distribute ingredients.
✔ Sifter: Breaks up clumps in flour, baking powder, or baking soda, ensuring smooth mixing.
✔ Large Mixing Bowl: Provides enough space to mix thoroughly without spilling.
🔹 Pro Tip: Always mix the dry ingredients before adding any liquids or fats. This prevents clumping and ensures the best distribution of ingredients.
Final Thoughts
Properly mixing your dry ingredients is the first key step to achieving light, fluffy, and well-risen dinner roll recipe no yeast. Taking the extra time to evenly distribute the flour, leavening agents, salt, and sugar sets the stage for perfect results every time.
Next up? Incorporating the wet ingredients to bring the dough together!
Step 2: Adding Wet Ingredients and Forming the Dough dinner roll recipe no yeast
Once the dry ingredients are properly mixed, it’s time to incorporate the wet ingredients and form the dough. This step is crucial because it determines the texture, moisture level, and overall consistency of your dinner roll recipe no yeast. Adding liquids in the right way and kneading the dough correctly ensures that your rolls turn out soft, fluffy, and easy to shape.
Why the Right Wet Ingredients Matter
Wet ingredients like milk (or buttermilk), butter (or oil), and eggs work together to create a dough that is:
✅ Soft and Moist – The fat content in butter or oil helps keep the rolls tender.
✅ Easy to Work With – Proper hydration prevents the dough from being too dry or too sticky.
✅ Well-Structured – The right balance of wet and dry ingredients ensures that the rolls hold their shape and don’t fall apart.
Step-by-Step Guide to Adding Wet Ingredients and Forming the Dough
1. Warm the Wet Ingredients for Better Incorporation
Using room-temperature or slightly warm liquids helps the dough come together more smoothly and prevents any ingredients from clumping.
🔹 Milk or Buttermilk: Slightly warm (about 100–110°F or 37–43°C) so it blends easily into the flour.
🔹 Melted Butter or Oil: Should be liquid but not too hot; warm butter helps with even distribution.
🔹 Egg (If Using): If the recipe includes an egg, let it come to room temperature before mixing—it helps with structure and moisture.
🔹 Pro Tip: Never add hot liquid directly to the dry ingredients, as it can interfere with the leavening agents and make the dough sticky or overly soft.
2. Gradually Incorporate Wet Ingredients into the Dry Mix
Instead of pouring all the wet ingredients in at once, add them gradually while mixing to ensure even absorption.
🔹 How to mix:
✔ Make a Well in the Center – Create a small hole in the middle of the dry ingredients and pour the wet ingredients in slowly.
✔ Stir Gently with a Spoon or Spatula – Use a wooden spoon or spatula to mix the ingredients just until combined.
✔ Avoid Overmixing – Overmixing can lead to dense or tough rolls because it develops too much gluten.
🔹 Pro Tip: If the dough seems too dry, add 1 tablespoon of milk at a time until it reaches the right consistency. If it’s too sticky, add 1 tablespoon of flour until it becomes manageable.
3. Forming the Dough: Bringing Everything Together
Once the wet and dry ingredients are combined, the dough may appear shaggy and slightly sticky—this is normal. The next step is gently kneading to bring everything together.
🔹 How to properly knead the dough:
✔ Lightly Flour Your Hands and Surface – Prevents sticking while kneading.
✔ Fold and Press Gently – Avoid overworking the dough; knead for about 1–2 minutes until it becomes smooth.
✔ Stop Kneading When Dough is Soft and Holds Together – It should feel soft but not too sticky or dry.
🔹 Pro Tip: Unlike yeast-based dough, you don’t need to knead too much—just enough to bring the ingredients together into a cohesive, smooth dough. Over-kneading can make the rolls dense instead of light and fluffy.
Common Mistakes to Avoid When Forming the Dough
❌ Adding too much flour – This can make the rolls dry and dense. Always add small amounts gradually.
❌ Overmixing or over-kneading – This develops too much gluten, leading to tough rolls.
❌ Using cold wet ingredients – Cold liquids can make it harder for the dough to mix evenly.
Final Thoughts: dinner roll recipe no yeast
Once the dough is formed, it’s ready for shaping into rolls! By properly adding wet ingredients and gently kneading, you ensure that your no-yeast dinner rolls come out moist, fluffy, and perfectly textured every time.
Next up? Shaping and baking your dinner rolls for golden perfection!
Step 3: Shaping the dinner roll recipe no yeast and Prepping for Baking
Once your dough is mixed and ready, the next step is shaping it into perfectly round, soft dinner roll recipe no yeast and preparing them for baking. Proper shaping ensures even baking, a beautiful golden crust, and a soft, fluffy texture inside. This step also includes important pre-baking techniques like brushing the tops, spacing the rolls correctly, and setting up the oven for the best results.
Why Proper Shaping and Preparation Matter: dinner roll recipe no yeast
✅ Even Baking – Uniformly shaped rolls cook at the same rate, preventing some from being underbaked or overbaked.
✅ Fluffy Texture – Proper shaping helps retain air pockets, ensuring light and airy rolls.
✅ Golden, Buttery Finish – Brushing with butter, milk, or an egg wash enhances the crust’s color and flavor.
✅ Professional Appearance – Neatly shaped rolls make the final presentation more appealing, especially for serving guests.
Step-by-Step Guide to Shaping and Prepping the dinner roll recipe no yeast
1. Divide the Dough Evenly
To ensure your rolls bake uniformly, it’s important to divide the dough into equal portions.
🔹 How to portion the dough: dinner roll recipe no yeast
✔ Use a bench scraper or knife – Divide the dough into 8 to 12 equal pieces, depending on your desired roll size.
✔ Weigh the pieces for consistency – If you want each roll to be exactly the same size, use a kitchen scale.
✔ Shape gently – Avoid pressing too hard, as this can make the rolls dense.
🔹 Pro Tip: If the dough is sticking to your hands, lightly dust your fingers with flour or rub them with a little oil.
2. Roll the Dough into Smooth Balls
Shaping the dough correctly helps create a soft, fluffy interior and a smooth, golden crust.
🔹 How to shape the rolls: dinner roll recipe no yeast
✔ Flatten each dough piece slightly and gather the edges toward the center to create surface tension.
✔ Pinch the seams together underneath, then gently roll the dough ball between your palms to smooth it out.
✔ Place seam-side down on a prepared baking sheet or dish.
🔹 Pro Tip: Don’t overwork the dough while shaping, or it could become too dense. Gentle handling ensures the rolls stay light and fluffy.
3. Arrange the Rolls for Baking
The way you place your rolls on the baking tray affects their final shape and texture.
🔹 Spacing Options:
✔ Close together (touching slightly): Rolls will bake into each other, creating soft sides and a “pull-apart” texture.
✔ Spaced apart: Rolls will have crispy edges all around and more browning.
🔹 Best Baking Dish Choices:
✔ Baking Sheet with Parchment Paper – If you want golden brown rolls with slightly crisp edges.
✔ Round or Square Baking Dish – Perfect for soft, pull-apart rolls with golden tops but tender sides.
✔ Cast Iron Skillet – Retains heat well and creates a slightly crisp bottom with a soft interior.
4. Brush the Tops for a Golden Finish
Before baking, adding a finishing touch to the tops of the rolls enhances both their appearance and flavor.
🔹 Brushing Options:
✔ Melted Butter – Creates a rich, golden crust and keeps the rolls soft.
✔ Milk or Cream – Helps with browning and adds a slight sheen.
✔ Egg Wash (1 egg + 1 tbsp milk/water) – Gives the rolls a shinier, golden brown finish.
🔹 Pro Tip: For extra buttery flavor, brush melted butter both before and after baking!
5. Preheat the Oven and Set the Right Temperature
Proper oven settings are key to achieving soft, evenly baked dinner rolls.
🔹 Best Temperature for No-Yeast Dinner Rolls:
✔ 375°F (190°C) – Balanced heat for a golden crust while keeping the inside soft.
✔ 400°F (200°C) – For a slightly crispier, more golden crust.
🔹 Baking Time:
✔ Bake for 15–20 minutes, or until the tops are golden brown.
✔ Check doneness by tapping the top – if it sounds hollow, they’re ready!
🔹 Pro Tip: If your rolls are browning too quickly but not fully baked inside, cover them loosely with foil in the last 5 minutes.
Final Thoughts: dinner roll recipe no yeast
By shaping the dough correctly and prepping your rolls before baking, you ensure they turn out beautiful, golden, and deliciously soft every time. Now, it’s time for the final step—baking to perfection and serving warm, buttery rolls!
Step 4: Baking at the Right Temperature for the Perfect Texture
Now that your no-yeast dinner rolls are shaped and prepped, it’s time for the most crucial step—baking them at the right temperature to achieve a golden, fluffy, and perfectly textured result. The right oven settings ensure the rolls cook evenly, develop a soft interior, and form a slightly crisp yet tender crust.
Why Baking Temperature Matters
Baking is all about precision, and even a small temperature mistake can affect the final texture of your dinner rolls.
✅ Golden Brown Crust – A properly heated oven allows the surface to caramelize, creating an appetizing golden-brown top.
✅ Soft, Fluffy Interior – The right temperature ensures even cooking inside, preventing a doughy or dense texture.
✅ Consistent Baking – A well-preheated oven prevents undercooked centers or burnt tops.
Step-by-Step Guide to Baking dinner roll recipe no yeast
1. Preheat the Oven Properly
Unlike yeast-based bread, dinner roll recipe no yeast depend entirely on baking powder and baking soda for leavening, which start reacting as soon as they mix with liquid. That’s why preheating the oven before baking is crucial—if the rolls go into a cold oven, they won’t rise properly and might turn out dense.
🔹 Best Preheating Temperature:
✔ 375°F (190°C) – Ideal for soft, fluffy dinner roll recipe no yeast with a golden top and tender inside.
✔ 400°F (200°C) – Great for slightly crispier edges and deeper browning.
🔹 Pro Tip: Always let your oven preheat for at least 10–15 minutes before putting the rolls in. A well-heated oven ensures the dough starts baking immediately, locking in air pockets for a light texture.
2. Position the Baking Tray Correctly
Where you place your tray in the oven makes a big difference in how the rolls bake.
🔹 Best Oven Rack Placement:
✔ Middle Rack – Ensures even heat distribution, preventing the bottoms from burning or the tops from over-browning.
✔ Lower Rack – Can be used if you want extra browning on the bottom of the rolls, but watch closely to prevent burning.
🔹 Pro Tip: If your oven has hot spots (some areas bake faster than others), rotate the tray halfway through baking for even browning.
3. Bake for the Right Amount of Time
dinner roll recipe no yeast bake much faster than traditional yeast rolls, usually within 15–20 minutes. The key is to bake them long enough to cook through but not so long that they dry out.
🔹 How to know when your dinner roll recipe no yeast are done:
✔ Golden brown color – The tops should have a warm, golden hue.
✔ Hollow sound – Tap the top of a roll; if it sounds hollow, it’s done.
✔ Soft but firm texture – The rolls should feel set, not doughy or overly hard.
🔹 Pro Tip: If your rolls are browning too fast but still need more time inside, loosely cover them with aluminum foil in the last 5 minutes to prevent over-browning.
4. Final Touch: Brushing with Butter for Extra Flavor dinner roll recipe no yeast
As soon as the rolls come out of the oven, brushing them with melted butter enhances their texture and flavor.
🔹 Why Brush with Butter?
✔ Keeps the crust soft – Prevents the tops from becoming too crisp.
✔ Adds rich flavor – Butter soaks into the warm rolls, making them even more delicious.
✔ Enhances presentation – Gives the rolls a beautiful, glossy finish.
🔹 Optional Toppings:
✔ Garlic Butter – Mix melted butter with garlic powder for a savory twist.
✔ Honey Butter – Combine melted butter with a little honey for a sweet touch.
✔ Herb Butter – Add fresh or dried herbs for extra flavor.
Common Baking Mistakes to Avoid
❌ Skipping the preheat step – A cold oven leads to dense, under-risen rolls.
❌ Overbaking – Too much time in the oven dries out the rolls and makes them tough.
❌ Placing rolls too close or too far apart – Touching rolls create soft pull-apart sides, while spaced rolls develop crispier edges.
Final Thoughts: dinner roll recipe no yeast
Baking at the right temperature and for the right amount of time is the key to perfect no-yeast dinner rolls—golden on the outside, soft and fluffy on the inside. Now, all that’s left is to serve them warm and enjoy!
Tips for Soft and Fluffy Dinner Roll Recipe No Yeast

Use Cold Butter for a Biscuit-Like Texture
When it comes to creating the perfect texture for your dinner roll recipe no yeast, one of the most important tips is to use cold butter. The temperature of your butter affects how it interacts with the flour and the other ingredients, influencing the texture of the final product. If you’re aiming for a biscuit-like texture, which is flaky, tender, and light, cold butter is essential in achieving that result.
Why Cold Butter Creates a Biscuit-Like Texture
Cold butter helps to create layers in the dough, similar to how it works in biscuits or scones. When you mix cold butter with flour, it doesn’t fully blend into the mixture like a room-temperature butter would. Instead, the cold butter remains in small pieces or chunks within the dough. These small pockets of butter, when baked, create steam that lifts the dough, leading to a flaky, light texture inside the dinner roll recipe no yeast.
The Science Behind Cold Butter:
- Fat Distribution: Cold butter is mixed into the flour, but it remains solid in small chunks.
- Creating Air Pockets: As the butter melts in the oven, it creates steam, which puffs up the dough and forms air pockets between layers, creating a flaky texture.
- Moisture Control: Cold butter prevents the flour from fully absorbing the fat immediately, keeping the dinner roll recipe no yeast moist but not greasy.
Step-by-Step Guide to Using Cold Butter “dinner roll recipe no yeast”
1. Cut the Cold Butter Into Small Cubes
To help the cold butter mix into the dough evenly, cut it into small cubes. This ensures the butter pieces don’t melt too quickly and helps create the desired texture.
🔹 How to prepare:
✔ Use a sharp knife or pastry cutter to cut the butter into cubes that are about 1/2-inch in size.
✔ Work quickly – The goal is to keep the butter as cold as possible before it’s mixed with the dry ingredients.
🔹 Pro Tip: If the butter starts to soften while you’re cutting it, return it to the fridge for a few minutes before proceeding.
2. Add the Cold Butter to the Flour Mixture
Once the butter is cubed, add it directly to the flour mixture. The goal is to work the butter into the flour while maintaining its cold, solid form. This will help to create the signature flaky texture you want in your rolls.
🔹 How to incorporate the cold butter:
✔ Use a pastry cutter or fork to cut the cold butter into the flour.
✔ Work quickly to avoid warming up the butter too much.
✔ Stop when the mixture resembles coarse crumbs – some small pieces of butter should remain visible in the dough, giving the rolls their signature texture.
🔹 Pro Tip: If you don’t have a pastry cutter, you can use your fingertips to rub the cold butter into the flour, but do so lightly and quickly to prevent the butter from warming up.
3. Mix in the Wet Ingredients and Form the Dough
After the butter is incorporated, the wet ingredients should be added to form a dough. Keep the process gentle and avoid overmixing, as this can disrupt the delicate layers that the cold butter has created.
🔹 How to proceed:
✔ Add the wet ingredients slowly – Once you combine the dry and wet ingredients, mix just until incorporated.
✔ Do not overwork the dough – Overmixing could cause the butter to melt too much, leading to a less flaky texture.
🔹 Pro Tip: If you feel the dough is starting to become sticky or too warm, place it in the fridge for 10–15 minutes before continuing. This will help the butter firm back up, improving the texture.
How Cold Butter Affects the Final Texture
When baking, the cold butter melts and releases steam as it heats up, creating flaky layers that rise and puff up, giving the rolls a biscuit-like texture. As the dough bakes, the solid fat (cold butter) creates pockets of air, leading to a lighter, more tender roll. The result is a fluffy interior with a slightly crisp, golden-brown exterior.
Characteristics of Rolls Made with Cold Butter:
✅ Flaky Layers – The rolls will break apart easily in layers when torn open.
✅ Tender Crumb – The inside will be soft and airy without being dense or heavy.
✅ Golden Brown Crust – The outside will have a slightly crisp, golden crust.
Common Mistakes to Avoid When Using Cold Butter
❌ Using soft butter – This prevents the dough from forming layers and leads to a denser texture.
❌ Overmixing the dough – This causes the butter to melt into the dough, which results in a heavier, less flaky roll.
❌ Allowing the butter to soften too much – If the butter gets too soft or warm before baking, the dough won’t have that desired flakiness.
Final Thoughts: dinner roll recipe no yeast
Using cold butter is one of the easiest and most effective ways to make your no-yeast dinner rolls light, tender, and flaky—just like a classic biscuit! It’s a simple trick that delivers big results and enhances the texture, making every bite soft, moist, and delicious.
Don’t Overmix the Dough to Avoid Dense dinner roll recipe no yeast
One of the most common mistakes when making dinner roll recipe no yeast is overmixing the dough. While it’s tempting to thoroughly mix and knead the dough, especially when you’re eager to get your rolls into the oven, overmixing can lead to dense, tough rolls instead of light, fluffy ones. This happens because the ingredients become too well-combined, leading to the activation of gluten, which can create a chewy, heavy texture. Let’s dive into why gentle mixing is key and how it can ensure your rolls turn out perfectly light and airy.
Why Overmixing Leads to Dense dinner roll recipe no yeast
When you combine flour with water or liquid, it activates the gluten proteins in the flour, which give structure to your dough. However, too much mixing results in excess gluten development, which can make the dough tough and overly elastic, resulting in a dense roll. This is something to be especially mindful of when making no-yeast rolls, where the goal is to maintain a tender and flaky texture.
The Science of Gluten Formation:
- Gluten Development: Gluten is created when flour proteins, gliadin and glutenin, combine with water. The more you mix or knead, the more gluten forms.
- Excessive Gluten: When you overmix, the dough becomes tougher, restricting the air pockets needed for a light texture. The result is dense, chewy rolls instead of soft, fluffy ones.
- Tenderness vs. Toughness: By limiting the amount of gluten formation, you ensure the rolls maintain a soft, tender crumb.
How to Avoid Overmixing: dinner roll recipe no yeast
To achieve light, fluffy rolls, it’s important to mix gently and only until just combined. Here’s a step-by-step guide on how to handle the dough carefully.
1. Mix Until the Ingredients are Incorporated
Once you add your wet ingredients (like milk or buttermilk) to the dry mixture (flour, baking powder, salt), your goal is to just bring everything together into a dough. You don’t need to worry about getting it perfectly smooth—small lumps or unevenness in the dough are perfectly fine. The goal is to make sure no dry flour is left, but don’t go beyond that.
🔹 How to Mix Gently:
✔ Use a spatula, wooden spoon, or dough scraper to stir the ingredients together until they just form a rough dough.
✔ Avoid using a mixer – Mixing by hand ensures a gentler approach, reducing the risk of overworking the dough.
✔ Do not knead the dough like bread dough – Kneading develops more gluten, which you want to avoid for this recipe.
2. Stop Mixing as Soon as the Dough Comes Together
As soon as the ingredients are just combined into a soft dough, stop mixing. The dough should be slightly sticky but not wet or too dry. If the dough sticks to your hands, you can lightly flour your hands, but avoid adding too much flour, as this will make the dough stiffer.
🔹 Pro Tip: Do not worry if the dough is a bit uneven—this is actually a sign that you’ve mixed it enough. Overmixing can make the dough smooth but dense, which will impact the fluffiness of your rolls.
3. Handle the Dough with Care When Shaping
Once the dough has come together, it’s time to shape your rolls. However, be careful not to handle the dough too roughly. Gentle shaping is key to maintaining the tender texture.
🔹 Shaping the dinner roll recipe no yeast:
✔ Gently flatten the dough and divide it into portions without pressing down hard.
✔ Do not overwork the dough when shaping, as this will deflate the air pockets and lead to a denser texture.
✔ Form each roll by gently folding the edges into the center to keep the layers intact.
Signs You’ve Overmixed the Dough
If you’re unsure whether you’ve overmixed your dough, here are a few signs to look for:
1. The Dough is Too Smooth
If the dough looks too smooth and feels elastic, it’s likely that you’ve overworked it. The dough should still have some rough edges and texture, and it should feel soft, not firm.
2. The Dough is Tough to Work With
If the dough feels overly stiff or tough, that’s another indication of overmixing. Tough dough doesn’t allow for easy shaping or pulling apart into soft rolls—it will feel dense and resist stretching.
3. The Rolls Turn Out Dense
Once baked, if your rolls appear flat and dense with no noticeable rise, it’s a good sign that you’ve overmixed the dough. They might also be dry and hard in texture.
How to Fix Overmixed Dough (Before Baking “dinner roll recipe no yeast”)
If you suspect that you’ve overmixed the dough, don’t worry—there are a few ways to salvage it before baking:
1. Let the Dough Rest
Letting the dough rest for about 15 minutes can help relax the gluten and give it time to soften. The dough will be less elastic, making it easier to shape.
2. Add More Liquid
If the dough feels too tough, you can add a little extra milk or buttermilk to loosen it up. Just a small amount (1–2 tablespoons) should help bring the dough back to a softer consistency.
Final Thoughts: dinner roll recipe no yeast
Gentle mixing is the key to avoiding dense, tough dinner rolls. By working with the dough carefully and only mixing until the ingredients are just combined, you ensure a light, fluffy texture in every roll. The result will be tender, pull-apart rolls that melt in your mouth, making your meal even more enjoyable.
Brush with Butter After Baking for Extra Softness “dinner roll recipe no yeast”
One of the final touches to making your no-yeast dinner rolls even more irresistible is to brush them with butter immediately after baking. This simple yet effective step can elevate the texture and flavor, adding a soft, glossy finish to the rolls while keeping them moist and tender. Whether you’re aiming for a savory, slightly sweet, or herb-infused flavor, brushing with butter after baking can really make a difference.
Why Butter Makes a Difference: dinner roll recipe no yeast
When dinner rolls come out of the oven, they are hot and still absorbing heat. Brushing them with melted butter not only adds a beautiful glossy finish, but it also enhances the flavor and improves the texture of the rolls. Here’s why this step is so beneficial:
1. Softens the Crust
When baking, the exterior of the rolls naturally hardens slightly. Brushing them with butter helps to soften the crust, giving the rolls a tender texture that’s easy to tear and enjoy. The butter soaks into the top layer, helping the rolls maintain their moisture and preventing them from becoming dry as they cool.
2. Adds Flavor
Butter brings a rich, savory flavor that complements the soft, fluffy interior of the rolls. The creamy, slightly salty taste of butter works well with any meal, making these rolls the perfect side dish. Whether you use unsalted butter for a more neutral flavor or salted butter for extra seasoning, the addition of butter enhances the overall taste profile.
3. Creates a Beautiful Glossy Finish
Brushing melted butter over the top of the rolls creates a beautiful, shiny finish that makes them visually appealing. The glossy surface makes the rolls look golden and appetizing, which is especially important when serving them at a gathering or dinner party.
How to Brush Butter on Your dinner roll recipe no yeast
1. Melt the Butter Properly
To get the best result, melt the butter just before you’re ready to use it. Make sure it’s not too hot, as scalding hot butter might cause the rolls to lose moisture too quickly. You want the butter to be just warm enough to brush easily.
🔹 Pro Tip: For extra flavor, consider infusing the butter with herbs or garlic before brushing. This can be done by adding minced garlic, thyme, rosemary, or parsley to the butter and heating it gently to release the flavors.
2. Brush Evenly Across the dinner roll recipe no yeast
Using a pastry brush, gently apply a thin, even layer of melted butter across the top of the rolls. Make sure to coat the entire surface so each roll benefits from the added moisture and flavor.
🔹 Pro Tip: Be careful not to saturate the rolls too much—use just enough butter to create a glossy sheen and enhance the texture. Too much butter could result in a greasy exterior.
Optional Variations: Flavoring the Butter “dinner roll recipe no yeast”
While plain butter is delicious, you can easily elevate the flavor by infusing it with different herbs or spices, making it more versatile depending on the type of meal you’re serving. Here are some ideas for adding unique flavors to your butter:
1. Garlic Butter
Garlic butter adds an aromatic, savory flavor that pairs wonderfully with dinner rolls. Simply melt the butter and stir in some minced garlic. For an extra punch, you can sauté the garlic in a little olive oil before adding it to the butter to release the flavors.
🔹 Why it works: Garlic butter is perfect for Italian, Mediterranean, or roast dinner dishes. The rich garlic flavor complements the softness of the rolls, making them even more indulgent.
2. Herb-Infused Butter
Herb-infused butter is a great way to add freshness and complexity to your rolls. You can use fresh or dried herbs such as rosemary, thyme, parsley, or basil. Simply melt the butter and stir in your desired herbs. For a more intense flavor, you can heat the herbs with the butter for a few minutes, allowing the natural oils to infuse into the fat.
🔹 Why it works: Herb butter enhances the flavor of roast meats, soups, and vegetable dishes, making it a great addition to holiday meals or everyday dinners.
3. Honey Butter
For a slightly sweet touch, honey butter is a fantastic option. Mix melted butter with honey and a pinch of salt to create a balance of sweet and salty that works particularly well with breakfast rolls or when paired with savory dishes.
🔹 Why it works: Honey butter adds a sweet, comforting touch, making the rolls perfect for a cozy meal. It pairs beautifully with biscuits, pancakes, or even roasted vegetables.
When to Brush with Butter
While it’s best to apply butter immediately after the rolls come out of the oven, timing is key. Here are a few things to keep in mind:
1. Right After Baking
Once the rolls are baked and golden brown, the crust is still warm and flexible, so brushing the butter at this point ensures it absorbs properly into the surface, softening the exterior.
2. Optional Second Layer
If you want a more intense buttery flavor, you can brush a second layer of butter onto the rolls about 5 minutes after baking. This is especially effective if you’re using flavored butters like garlic or honey butter.
How Brushing with Butter Enhances Your Rolls
Incorporating this final step of brushing the rolls with butter ensures that your no-yeast dinner rolls will not only be fluffy and soft on the inside but also moist, tender, and glossy on the outside. The butter enriches the flavor, gives them a professional finish, and helps prevent the rolls from drying out too quickly after baking.
By brushing with butter, you’re not only enhancing the rolls in terms of taste and texture but also making them more appealing visually—making them irresistible on the dinner table. So, don’t skip this step—it’s the secret to perfect dinner rolls every time!
Final Thoughts: dinner roll recipe no yeast
Brushing your rolls with butter after baking is a small step that makes a big difference in both texture and flavor. Whether you prefer savory garlic butter, fresh herb butter, or a sweet honey glaze, this simple touch can take your no-yeast dinner rolls from good to great, adding a layer of richness and softness that everyone will love.
Serving Suggestions and Storage Tips: dinner roll recipe no yeast

Pair With: Soups, Salads, or Holiday Dinners
dinner roll recipe no yeast are incredibly versatile and can be paired with a wide range of dishes, making them the perfect addition to any meal. Whether you’re serving them as a side for a warm, comforting soup, adding them to a light and fresh salad, or incorporating them into a festive holiday dinner spread, these rolls complement a variety of flavors and textures. Let’s explore some of the best ways to pair these delicious, fluffy rolls with different meals.
1. Pair with Soups: The Perfect Comfort Food Combination
There’s nothing quite like a warm, soft dinner roll paired with a hearty soup. These rolls are perfect for dipping into a flavorful broth or scooping up the last bit of soup from the bowl. Since they have a tender crumb and a slightly crisp crust (especially when brushed with butter), they absorb liquids well without falling apart.
Best Soups to Serve with dinner roll recipe no yeast:
- Creamy Soups: Rolls pair wonderfully with creamy tomato soup, loaded potato soup, or broccoli cheddar soup, where the richness of the soup is balanced by the light, buttery roll.
- Brothy Soups: Enjoy them with chicken noodle soup, vegetable soup, or minestrone, using the roll to soak up the flavorful broth.
- Hearty Soups & Stews: If you’re making a beef stew, lentil soup, or chili, these rolls work great as a side for a filling, comforting meal.
🔹 Serving Tip: Warm up the rolls and serve them with a side of garlic butter or herb-infused butter for an extra layer of flavor.
2. Pair with Salads: A Light and Satisfying Meal
For a balanced meal, pair your dinner roll recipe no yeast with a fresh salad. The soft, buttery texture of the rolls contrasts beautifully with the crisp greens and vibrant flavors of a well-dressed salad. This combination works great for a light lunch or as a side dish for a more elaborate dinner.
Best Salads to Serve with dinner roll recipe no yeast:
- Classic Caesar Salad: The crisp romaine lettuce, parmesan cheese, and creamy dressing pair beautifully with a warm, soft roll.
- Greek Salad: The tangy feta cheese, olives, and cucumbers contrast nicely with the buttery flavor of the roll.
- Spinach & Strawberry Salad: A mix of baby spinach, fresh strawberries, goat cheese, and a balsamic glaze goes well with the light, fluffy texture of these rolls.
- Cobb Salad: A hearty salad with grilled chicken, bacon, avocado, and eggs benefits from a roll on the side to round out the meal.
🔹 Serving Tip: For extra indulgence, slice a warm roll in half and spread it with a flavored butter or cream cheese before serving it alongside your salad.
3. Pair with Holiday Dinners: A Must-Have for Special Occasions
No holiday meal is complete without freshly baked dinner rolls, and these no-yeast rolls are a quick and easy alternative to traditional yeast rolls. Whether it’s Thanksgiving, Christmas, Easter, or a special family gathering, these rolls are sure to be a hit on the dinner table.
Best Holiday Dinners to Serve with No-Yeast Dinner Rolls:
- Thanksgiving Dinner: Serve alongside roast turkey, mashed potatoes, stuffing, and cranberry sauce—these rolls are perfect for making mini leftover sandwiches the next day!
- Christmas Feast: Pair them with a glazed ham, prime rib, or roasted chicken for a classic holiday meal.
- Easter Brunch: These rolls work well with honey-baked ham, roasted vegetables, and deviled eggs, making for a delicious springtime spread.
- Sunday Roast Dinner: Whether you’re making pot roast, roast chicken, or grilled pork chops, these rolls will soak up all the delicious flavors of gravies and sauces.
🔹 Serving Tip: Brush the rolls with garlic butter or honey butter before serving to enhance their flavor and make them extra special for holiday meals.
Bonus: Creative Ways to Use Leftover dinner roll recipe no yeast
If you have extra dinner roll recipe no yeast after your meal, don’t let them go to waste! Here are some creative ways to repurpose them:
- Mini Sandwiches: Slice them in half and use them for turkey, ham, or roast beef sliders with cheese and condiments.
- Bread Pudding: Turn day-old rolls into a sweet or savory bread pudding by soaking them in a custard mixture and baking.
- Croutons: Cut the rolls into cubes, toss them with olive oil and seasoning, and bake them until crispy for homemade croutons.
- Dipping Bread: Serve with olive oil, balsamic vinegar, or a cheese dip for a simple appetizer.
Final Thoughts: dinner roll recipe no yeast
These dinner roll recipe no yeast are a versatile, easy-to-make side dish that pairs beautifully with soups, salads, and holiday dinners. Whether you’re dipping them into a bowl of warm soup, enjoying them alongside a fresh salad, or serving them as part of a festive holiday feast, these rolls add a comforting, homemade touch to any meal.
Storage: Keep in an Airtight Container for Up to 3 Days
Proper storage is key to keeping your no-yeast dinner rolls soft, fresh, and delicious for as long as possible. Since these rolls don’t contain yeast, they tend to dry out faster than traditional dinner rolls. However, with the right storage methods, you can extend their freshness and enjoy them for a few days after baking.
Why Proper Storage Matters: dinner roll recipe no yeast
Unlike store-bought bread, which often contains preservatives to prolong shelf life, homemade dinner rolls are free of artificial additives. Because of this, they can stale or harden quickly if not stored properly. Keeping them in an airtight container prevents moisture loss, maintains their soft texture, and protects them from absorbing unwanted odors from the fridge or pantry.
How to Store dinner roll recipe no yeast for Maximum Freshness
1. Cool Completely Before Storing
Before placing the rolls in a container, it’s important to let them cool completely at room temperature. Storing warm rolls can create condensation, which leads to excess moisture and makes the rolls soggy or prone to mold growth.
🔹 Pro Tip: Leave the rolls on a cooling rack for at least 30 minutes before storing them to ensure all trapped steam escapes.
2. Use an Airtight Container or Resealable Bag
To maintain softness, place the cooled rolls in an airtight container or zip-top bag. If you’re using a plastic or glass container, ensure it has a tight-sealing lid to prevent air from drying out the rolls.
🔹 Alternative Storage: If you don’t have an airtight container, you can wrap the rolls in plastic wrap or aluminum foil before placing them in a bag to add an extra layer of protection.
3. Store at Room Temperature for Up to 3 Days
No-yeast dinner rolls stay fresh for up to 3 days when stored at room temperature in a cool, dry place away from direct sunlight. Keeping them in the pantry or on the countertop in an airtight container will preserve their softness and flavor.
🔹 Avoid the Fridge! Storing bread in the refrigerator can actually make it go stale faster due to the way cold temperatures affect starch molecules in baked goods. Unless you live in an extremely humid area where mold develops quickly, it’s best to keep them at room temperature rather than refrigerating them.
How to Reheat Stored Rolls
Stored rolls may lose some of their softness over time, but you can easily refresh them with these simple reheating methods:
1. Microwave Method (Quick & Easy)
- Wrap a roll in a damp paper towel and microwave for 10-15 seconds.
- This restores moisture and softness, making the roll taste freshly baked.
- Best for: A single roll or a small batch when you’re in a hurry.
2. Oven Method (Best for Large Batches)
- Preheat the oven to 300°F (150°C).
- Wrap the rolls in foil to prevent them from drying out.
- Warm them for 8-10 minutes until soft and heated through.
- Best for: Reheating multiple rolls while maintaining their texture.
3. Stovetop Method (Crispy Exterior, Soft Interior)
- Place a roll in a covered skillet over low heat.
- Heat for a few minutes, flipping halfway for even warming.
- Adds a slight crisp to the outside while keeping the inside soft.
- Best for: Those who like a bit of texture on their rolls.
🔹 Bonus Tip: Brushing the reheated rolls with a little melted butter or olive oil before serving enhances their flavor and restores any lost moisture.
Can You Freeze No-Yeast Dinner Rolls?
Yes! If you want to store your rolls for longer than 3 days, freezing is the best option. No-yeast dinner rolls freeze exceptionally well and can be enjoyed weeks later with proper reheating.
How to Freeze the Rolls Properly
- Step 1: Let the rolls cool completely.
- Step 2: Wrap each roll individually in plastic wrap or aluminum foil to prevent freezer burn.
- Step 3: Place them in a freezer-safe zip-top bag or an airtight container.
- Step 4: Label the bag with the date so you know when you froze them.
🔹 How Long Can You Freeze Them?
- Frozen no-yeast dinner rolls stay fresh for up to 2 months.
- Beyond that, they are still safe to eat but may lose flavor and texture.
How to Reheat Frozen Rolls
- Oven Method: Bake at 300°F (150°C) for 10-15 minutes wrapped in foil.
- Microwave Method: Heat for 30-45 seconds on a microwave-safe plate, using a damp paper towel to retain moisture.
- Toaster Oven Method: Toast for 5-7 minutes at a low setting for a slightly crispy crust.
Final Thoughts: dinner roll recipe no yeast
By storing your no-yeast dinner rolls properly, you can keep them fresh and soft for up to 3 days at room temperature or longer in the freezer. Using an airtight container prevents them from drying out, while reheating methods like microwaving or baking can bring them back to their warm, fluffy texture.
If you’re making a big batch, freezing is an excellent option to enjoy homemade rolls anytime without extra work. Whether you eat them fresh, reheated, or frozen, these quick and easy dinner rolls will always be a delicious and comforting addition to your meals.
Reheating: Warm in the Oven or Microwave for a Fresh-Baked Taste
Nothing beats the taste of fresh-baked, warm dinner rolls. If your no-yeast dinner rolls have been stored for a day or two, they may lose some of their softness and warmth, but the good news is that they can be easily revived with a quick reheating method. Whether you’re in a hurry and need a microwave solution or you want to restore their full bakery-fresh texture using the oven, there are multiple ways to bring your rolls back to life.
Let’s go over the best reheating techniques to maintain their soft interior, light texture, and buttery flavor.
1. Oven Method (Best for Restoring Texture & Softness)
Reheating in the oven is the best way to bring back the original soft, fluffy texture of the rolls. It gently warms them without making them chewy or tough and helps retain their freshly baked flavor.
Steps for Reheating in the Oven:
- Preheat the oven to 300°F (150°C).
- Wrap the rolls in aluminum foil to prevent them from drying out.
- Place the wrapped rolls on a baking sheet.
- Bake for 8-10 minutes until they are warm and soft.
- Remove from the oven and brush with melted butter for extra flavor and moisture.
🔹 Pro Tip: If the rolls feel slightly dry before reheating, lightly sprinkle them with a few drops of water before wrapping them in foil—this creates a bit of steam, making them softer.
✅ Best For:
- Reheating multiple rolls at once
- Restoring the original soft, bakery-style texture
- Avoiding a chewy or rubbery texture
2. Microwave Method (Quick & Convenient)
If you’re short on time and need to warm up a roll or two quickly, the microwave is the fastest option. However, since microwaving can dry out bread or make it rubbery, you’ll need a moisture-boosting trick to keep your rolls soft and fluffy.
Steps for Reheating in the Microwave:
- Place the roll(s) on a microwave-safe plate.
- Cover with a damp paper towel—this prevents them from drying out.
- Microwave on medium power for 10-15 seconds (for one roll) or 20-30 seconds (for a small batch).
- If needed, add 5-second increments until the rolls are warm.
- Brush with melted butter before serving for added flavor and moisture.
🔹 Pro Tip: Use a lower power setting or reheat in short bursts to prevent overheating, which can make the rolls tough or chewy.
✅ Best For:
- Reheating a single roll or a small batch quickly
- A fast breakfast or snack option
- A soft texture without the wait
3. Toaster Oven Method (Crispy Outside, Soft Inside)
For those who enjoy a slightly crisp exterior while keeping the inside warm and soft, the toaster oven is a great choice. It’s faster than a full-sized oven but still provides even heating, helping the rolls retain their texture.
Steps for Reheating in a Toaster Oven:
- Preheat the toaster oven to 325°F (165°C).
- Place the rolls directly on the toaster oven rack or on a baking tray.
- Heat for 5-7 minutes until warm and slightly crisp on the outside.
- Optionally, brush with butter or honey butter after reheating for extra flavor.
🔹 Pro Tip: If you want a softer result, wrap the rolls loosely in foil before placing them in the toaster oven.
✅ Best For:
- People who prefer a slight crispiness on the outside
- Reheating a small batch of rolls evenly
- A quick, hassle-free method with great results
4. Stovetop Skillet Method (Crispy & Golden)
If you love buttery, golden-brown rolls, try reheating them in a skillet! This method adds a deliciously crisp bottom layer while keeping the inside warm and soft.
Steps for Reheating on the Stovetop:
- Heat a non-stick skillet or cast-iron pan over low-medium heat.
- Add a small amount of butter or oil to the pan.
- Place the rolls in the skillet and cover with a lid.
- Heat for 2-3 minutes, flipping occasionally, until warmed through and slightly golden.
- Remove from the skillet and serve immediately.
🔹 Pro Tip: This method works great for day-old rolls because the butter enhances the flavor and prevents dryness.
✅ Best For:
- Those who enjoy a toasted, slightly crispy roll
- Adding extra buttery flavor while reheating
- A quick, stovetop-friendly option
Reheating Frozen No-Yeast Dinner Rolls
If you stored your rolls in the freezer, you can reheat them directly from frozen without thawing first! Here’s how:
Oven Method (Best for Frozen Rolls)
- Preheat the oven to 325°F (165°C).
- Wrap the frozen rolls in foil.
- Bake for 12-15 minutes until warm and soft.
- Brush with butter before serving.
Microwave Method (Quickest for Frozen Rolls)
- Wrap a frozen roll in a damp paper towel.
- Microwave on medium power for 30-40 seconds.
- Let sit for a few seconds before eating.
🔹 Bonus Tip: If your frozen rolls seem dry after reheating, steam them for a few seconds or brush with melted butter to restore their softness.
Final Thoughts
Reheating no-yeast dinner rolls properly ensures they remain warm, soft, and just as delicious as when they were freshly baked.
- Use the oven for the best bakery-style texture.
- Use the microwave when you need a quick and easy warm-up.
- Use a toaster oven or skillet if you like a slight crispiness.
- If frozen, reheat directly from frozen for fresh, warm rolls anytime.
No matter which method you choose, adding a little melted butter after reheating will make your rolls taste even better!
Conclusion:
Easy, Quick, and delicious dinner roll recipe no yeast or Any Occasion
There you have it—no-yeast dinner rolls that are simple, quick, and incredibly delicious! Whether you’re short on time, craving fresh bread without the wait, or just looking for an easy way to enhance any meal, these rolls are the perfect solution. With a handful of basic ingredients and just a few simple steps, you can create soft, fluffy rolls that will impress your family and guests every time.
The best part? You don’t have to wait for dough to rise or deal with complicated techniques. These rolls come together in minutes, and with the right storage and reheating methods, you can enjoy them fresh for days. Plus, they’re incredibly versatile, pairing perfectly with soups, salads, and hearty holiday dinners.
By following the tips for shaping, baking, and reheating your rolls, you can ensure that they always come out light, tender, and flavorful. Whether you choose to enjoy them fresh out of the oven or reheated for a second round of deliciousness, these no-yeast dinner rolls will quickly become a staple in your kitchen.
So, the next time you’re looking for a quick and easy bread recipe, skip the yeast and try these fluffy, melt-in-your-mouth rolls. You’ll be amazed at how easy they are to make and how much everyone will love them.